How to install Nix on Fedora Silverblue
There is a lot to like about Fedora Silverblue.
Updates are atomic and if there is something wrong with the newest version, you can always roll back.
You always move between immutable images of your operating system, but that also means that installing packages with dnf doesn’t work anymore.
For GUI applications, the answers to this are flatpak and its app store flathub.
For everything else you can enter a mutable Fedora container with the help of toolbx.
There, the dnf command is readily available and can be used as usual.
This is convenient for development, but not necessarily outside it.
Whenever you want to use an installed CLI tool, you now have to enter the toolbx beforehand.
Also, there are a couple of system directories that are inaccessible from within the container.
Nix is a cross-platform package manager with the largest repository at the time of this writing. Like with Silverblue, upgrades in Nix are atomic and can be rolled back. In order to install it, we run the Determinate Nix installer:
curl --proto '=https' --tlsv1.2 -sSf -L https://install.determinate.systems/nix | sh -s -- installTo get started using Nix, open a new shell or run source nix-daemon.sh as shown below:
. /nix/var/nix/profiles/default/etc/profile.d/nix-daemon.shNow you can install tools on your machine with nix-env.
If that’s all you want, then you can skip over to the last section.
Home Manager
Section titled “Home Manager”Home Manager is a tool that allows declarative configuration of user specific packages and dotfiles. This not only helps you to keep track which changes you made to your user environment, but also greatly reduces the amount of work necessary to migrate to a new machine. Convinced? Then let’s get started!
First, we add the nixpkgs-unstable and home-manager channels.
nix-channel --add https://nixos.org/channels/nixpkgs-unstablenix-channel --add https://github.com/nix-community/home-manager/archive/master.tar.gz home-managerThen we update our nix-channels.
nix-channel --updateNow we can install home-manager with nix-shell.
nix-shell '<home-manager>' -A installYou can edit its config file by executing:
home-manager editThis should open your editor with a couple of values already set. In the following snippet you see:
- how to set your git data with useful extra config, and
- how to ensure that a set of nix packages is installed.
{ config, pkgs, ... }:
{  # Leave `home.username`, `home.homeDirectory`, `home.stateVersion`  # and `programs.home-manager.enable` as they are
  # Set git config  programs.git = {    enable = true;    userName  = "Julian Hofer";    userEmail = "julianhofer@gnome.org";    extraConfig = {      init = {        defaultBranch = "main";      };      pull = {        rebase = true;      };      rebase = {        autostash = true;      };    };  };
  # Ensure that the following packages are installed  home.packages = with pkgs; [    bat    fd    gh    glab    ripgrep  ];}
Now we activate our config file by executing
home-manager switchThis also means that if you remove a setting or package in the config file, it will be removed on your system as well.
In order to update your environment run:
nix-channel --update...unpacking channels...home-manager switchDistrobox
Section titled “Distrobox”Distrobox is a tool that creates container that are tightly integrated with the host. This makes it perfect for development tasks.
First install distrobox.
rpm-ostree install --apply-live distroboxEnter your distrobox with:
distrobox enterDistrobox mounts /nix inside of your container.
This way you can continue using Nix and the apps you’ve installed with it.
To see if everything is working as expected, you can try to view your git config with the cat-replacement bat:
bat ~/.config/git/config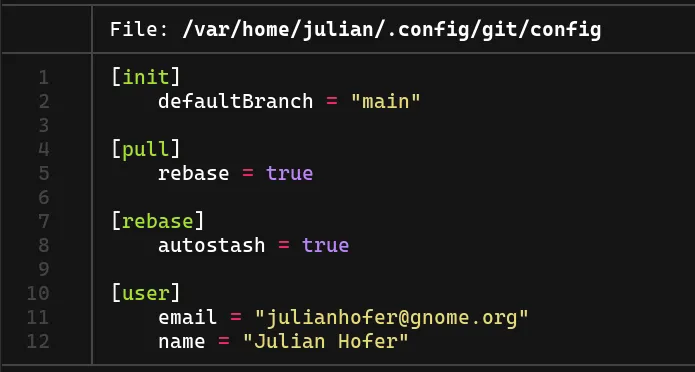
You can find the discussion at this Mastodon post.